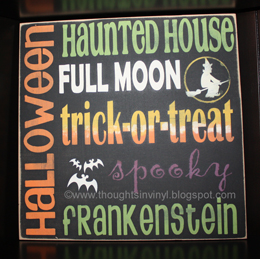
Subway Art Tutorial
Here is what I did for my subway art
(I painted mine chocolate brown.)

(I painted mine chocolate brown.)
This give away is for this cute Reversible Candy Caddy …and the best part is… it will come completely finished ready to be filled up with your favorite candy. {paper will different from what is pictured below…but still just as cute!} Give Away Value $26.50 If you want to purchase this reversible candy caddy unfinished it… Read More »
I have already mentioned that I love Halloween…but have I mentioned that I really really really love Halloween decorations?! They are just so fun and I had so many ideas running through my mind that this month has lots to choose from. The first little craft just made me smile when I thought of what… Read More »
I have been wanting to do a give away for ages. I finally have a few minutes between making crafts, shipping crafts and feeding my kids to post about doing one…(notice I didn’t mention cleaning my house — that has been put on hold until tomorrow…atleast I hope it will be clean tomorrow!) The give away… Read More »
I have always enjoyed decorating for Halloween, maybe it is because this is the one holiday that my mom didn’t mind if I played with the decorations (the old time decorations that were just poster board thin in the shapes of pumpkins and skeletons with movable arms and legs). I love the fun vibrant colors… Read More »
This month there are two different crafts. One is a seasonal craft and the other is a fun little craft to personalize your kids rooms. The first craft is another Seasonal Cube Set Fall starts September 22. Can you believe that?! It will be here before we know it. Just yesterday I found myself questioning… Read More »
The month of June didn’t go quite as I had planned. Our newest arrival to our family came three weeks early by c-section. She is such a sweet baby and we are glad she arrived safely! I did however get the July craft done the morning before she was born {thank goodness!} and I am so… Read More »
May Seasonal Cubes These seasonal cubes turned out so fun. In this kit you get three cubes and the vinyl for all sides of all the cubes. Two sides of each cube {making 6 sides all together} feature a different holiday or season. The first side is Summer {a cute little ant embelishes the top… Read More »
Mother’s day is sneeking right up on us, so I thought that I better get some crafts put together for the occasion. Mother’s Day Craft #1 The first Mother’s day crafts is a quote by Julie B. Beck. It is from an LDS conference talk in Oct. 2007. I just love the quote and thought… Read More »
I am so excited about how cute the crafts turned out this month. They are so fun with the soft spring colors and the bright summer colors. I did two projects again for this month {with a few more Mother’s Day ideas coming soon}. Project #1 One side features “Blossoms and Bumble Bees” I will… Read More »